top of page

WORD COUNT: 2140
SACE NO. #922148L
Images Refinement...
CHOSEN IMAGES
EDITED THROUGH ADOBE PHOTOSHOP


BEFORE:
ANNOTATING Before and after's:
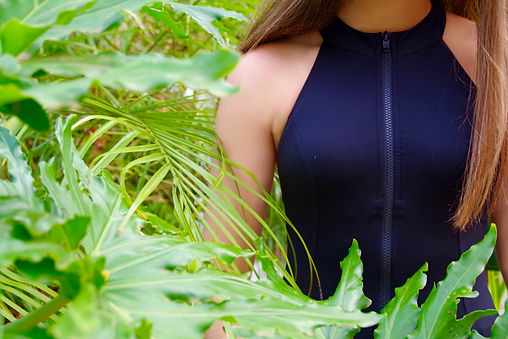
For this image I used the tools on Photoshop to enhance the colour of the swimwear and add warmth to the image. I also used the Mixer Brush tool to sooth her skin, define the line on her back and butt cheek and remove the bandaid from her finger. I also cropped the window seal out and the plants on the right.
AFTER:


When editing this image I firstly cropped it to the right to bring the attention mostly to the subject and also to straighten up the image. Then used the Mixer Brush tool again to soothe her skin. I also used photoshops tools to enhance the colour of the image and add contrast.
Photoshop tools


As seen in this before and after, I have enhanced the green and slightly decreased the contrast. Here I used the Mixer Brush tool to remove the creese lines in her armpit area. I also slightly cropped the the sides of the image .
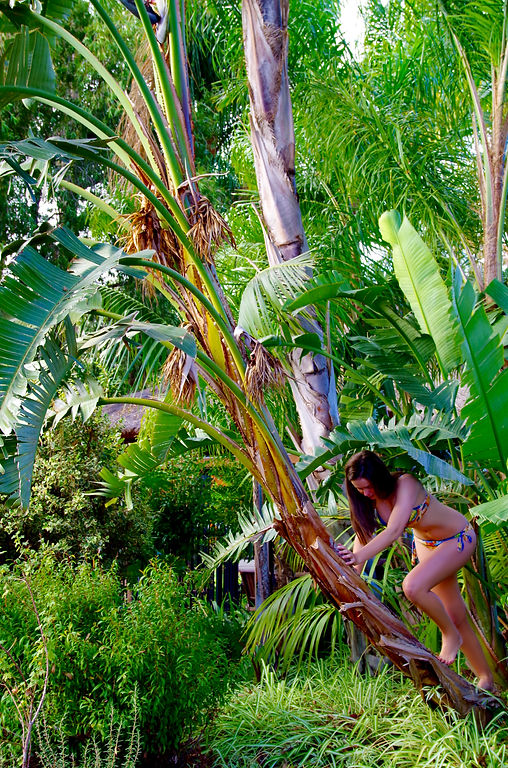
For this photo increased the contrast to make the palms lighten up and stand out more which it has done. I also used the Mixer Brush tool to remove the tag coming out of the side of the bathers.


For this image I enhanced the greenery as well as lightening it up as well to make everything brighter. I also used the Mixer Brush too soother her skin and darken it too.
This photo was edited by increasing the colour and adding contrast. You can tell by looking at the orange in the bikini and and green in the background.


For this photo I used the Mixer Brush to soother her skin. I also added warmth to the photo to make her skin look more tanned and also add comfort to the photo.
For this image I firstly used the Mixer Brush to smooth out her skin. I then adjusted the contrast by decreasing it to give this washed out effect. I love this effect because it makes all of the colours really stand out and puts a different perspective on the photo.


This is one of my favourite photos I took this day. To edit it, I firstly used the Mixer Brush tool to soothe the goose bumps from her arm and smooth the skin on her face. I then adjusted the photos colour settings by making it black and white. I then played around with the contrast settings to make my model glow. I then cropped it to square which brings to focus of the photo to her upper body.
As I said previously, I wanted to darken the background behind the palm. So this is exactly what I did by increasing the contrast. I also used the Mixer Brush to soothe her skin as well as the Spot Healing Brush to remove a few pimples.


To edit this photo I used the Sharpen tool to shine the anchor and triangle to make them stand out and shine. I also used the Mixer Brush to smooth her skin so that her arm hairs were not too visible. I cropped the photo to make it square and so that the bracelets where the centre of the photo.
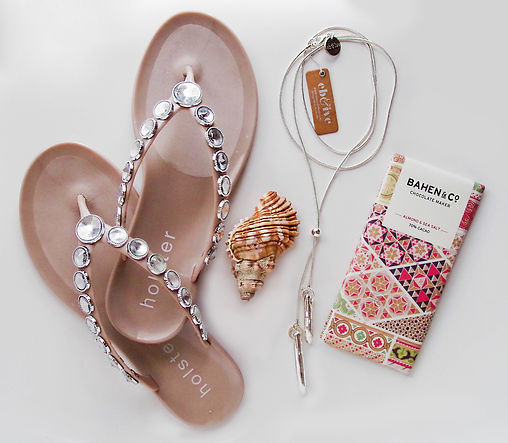
This is another one of my favourites because the difference between the original and the new photo is amazing. The first thing I did to this photo was cropping it to the size where it looked like it was sitting on a completely white surface. I then edited the colours of the photo by making it brighter and increasing the saturation. Next I used the Mixer Brush tool to smooth out the white background and remove the shadows. I then used the Sharpen tool to shine the necklace and the beads on the shoes. I also did this to the shell to give it more detail.


As said previously, I wanted to fix the watch as it looks old, dirty and worn. For this I used the Mixer Brush to soothe out the band and remove the creases. I also increased the contrast to make the texture of the towel stand out
For this image I firstly rotated it right and cropped it to square. I then lighted the image up and added saturation to make the colour of the image pop. I then slightly used the Mixer Brush to soothe out the white background.
Mixer Brush
To combine an area of colours
Eyedropper
Crop
Sharpen
Spot Healing Brush
Blur
To resize the image
To select a certain colour
To make an object less fuzzy
To remove any unwanted marks
To make an object seem less focused on.
 |  |  |  |  |
|---|---|---|---|---|
 |  |  |  |  |
 |  |  |  |  |
 |  |  |  |  |
 |  |  |  |  |
 |  |  |  |  |
 |  |  |  |  |
 |  |  |  |  |
 |  |  |  |  |
 |  |  |  |  |
 |  |  |  |  |
 |  |  |  |  |
 |  |  |  |
CLICK ON PHOTO TO MOVE SLIDE
bottom of page